Monday, August 5, 2013

Baby Girl's Nursery, Part 3: Lamp Makeover

"We can easily forgive a child who is afraid of the dark; the real tragedy of life is when men are afraid of the light."
-Plato

What I'm reading:  It Starts with Food
What I'm writing:  romance novel

As promised, today I am bringing you my lamp makeover.  That's right, your dreams have come true.

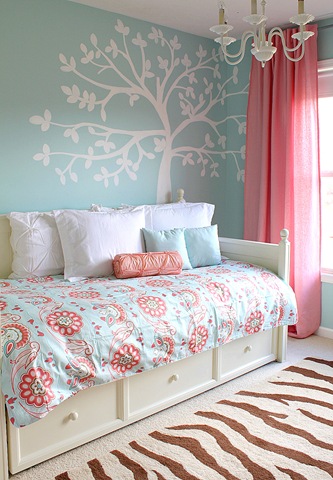
Much like the previous post about my canvas alternative, I wanted a cute lamp for Girl's dresser but did not want to spend $30+ at Target.  I headed to one of my favorite treasure-hunting spots:  the D.I., otherwise known as Deseret Industries.  For those of you who are out of state or not familiar with the D.I., it is basically Utah's version of Goodwill.  There are always lots of ugly "nice personality" lamps to choose from, and I was not disappointed this trip.  I spent $3 on a tall candlestick lamp with a square shade.  I wanted something with good form but I was not worried about color since I knew I would be performing an Extreme Makeover.

In typical not-yet-a-blogger fashion, I did not take a proper "before" picture of this lamp.  Just know that the base was kind of a beige with hand-painted floral vines running up the side.  A couple quick coats of white spray paint took care of the base.  (Remember, when painting lamps, always tape off the metal top section where the lightbulb goes, and the cord if desired.)

My bigger concern was the shade.
First, I was a little scared to tackle a square shade because I wasn't sure how to accommodate the corners.  This was another project where I spent way too much time obsessing over how to make things work, and finally said, "Shut up brain!" and decided to wing it.  I have found that no project is EVER as difficult in real life as I make it in my head.  The bigger concern, though, was that the shade was kind of a hand-made paper texture over very thin plastic, with dried leaves and twigs embedded in the paper.  I thought maybe I could just leave the garden clippings in the shade, but when I tried holding fabric over the lamp with the bulb on, this is how it looked:
AAAARGH!  Ghost Plants!  They only come out when the lights are on!  (There might be a book idea in that...)

Seriously, though, I knew I would never be happy with seeing these weird silhouettes every time we turned on the lamp.  At this point I had serious doubts the shade was salvageable, so I figured, what the heck, I'll try ripping out the foliage.
Using my amazing finger nails, I just carefully picked at the shade until I tore through the top paper layer, and then removed the dried botanical specimens.  It was very technical.  When I finished, the shade looked like this:
A little rough, but not bad, considering I was planning on covering the entire thing with fabric.  I spent some time on the Interwebs and found a perfect tutorial on Crafty Little Chick for covering a square lamp shade.  Once I had seen an example, I had a lot more confidence.

First, I laid the shade on one side on scrap paper and traced it to create a pattern.
(Yes, friends, that is Stampin' Up! scratch paper.  I pretty much used what I had sitting on my craft table.  I'm lazy resourceful that way.)  Next I pinned my pattern to my fabric of choice, which I had already washed and ironed.  I don't know why I pre-washed it, since there was really no risk of throwing my lamp shade in the washer and shrinking it.  I guess I'm an overachiever.
In the tutorial, she put matching bias tape around the corners, the top, and the bottom of the shade.  I decided I wanted to add decorative trim around the top and bottom instead, so I opted to just fold the fabric over the edges.  I added a little tab on the top and bottom to make this work:
I squared the edges of the top and bottom tab so I wouldn't have big bunches of fabric in the corners.


Next I used fabric glue along the edges to adhere the fabric.  This was a great option, since I figured my hot-glue gun would melt through the thin plastic of the shade.  I loved Crafty Little Chick's tip to use the glue only on the edges so the fabric can be removed easily if desired.  I am a nerd who hoards office supplies, so I had plenty of binder clips to hold the fabric in place while the glue dried.

I used 7/8" Heat n Bond tape to make bias tape for the four corners.  It was very easy and I discovered I really love this stuff.  Good thing I followed my craft hoarder instincts (are we noticing a hoarder theme here?) and bought 4 rolls.  One would hate to run out, wouldn't one? 
 I used hot glue to apply the bias tape to the edges, and to add Stampin' Up! Chocolate Chip ruffled ribbon around the top and bottom of the shade.  Now that I had fabric, I wasn't worried about melting the plastic.

NOTE:  The hardest part of this project was choosing the ribbon.  I sent a multitude of pictures to my sister, who patiently and lovingly told me they all looked great.  That is her official job as my sister.  In the end I loved the contrast between the light green and the dark brown.  Plus, the ribbon was pre-ruffled, which gave it about 50 bazillion bonus points.
Finally, I tried my hand at making ribbon rosettes.  I hadn't made these before, but there are tutorials all over the web.  They were very easy and honestly, would have been even cuter if I hadn't been all perfectionisty about wrapping them.  I used strips of pink fabric for two of them, and Mambo Melon polka dot ribbon from Stampin' Up! for the third.  I rocked the "use your stash" rule on this project.
 And the finished product:
Quite in love.  For this project I bought Heat & Bond tape, and that's it.  I had everything else already.  There are no Ghost Plants when I turn it on, and everyone who has seen the lamp thought it was purchased this way.

Thanks to Crafty Little Chick for the tutorial.  I think this is a great example of taking an idea you see online (or from a friend or in a magazine or whatever) and making it your own.  Be brave, say "Shut up, brain!" and go for it!

Friday, August 2, 2013

Baby Girls Nursery, Part 2: Wall squares

"You cannot adjust the wind, but you can adjust the sails."
-Unknown

What I'm reading:  It Starts with Food (I'm slow, okay?)
What I'm writing:  Back to the romance.  Charge!

Our house is big and "middle-aged" (not old!) and we have tons of expensive projects on the list that aren't all that fun or decorative (like replacing the water heater).  Because my decorating budget tends to run on the slim-to-none side, I'm always up for ideas that make a big impact for not a lot of dollars.

In the middle of my serious nesting, Husband and I took a pilgrimage over to the Salt Lake area to shop at Target (cue rays of light and singing angels).  I found these adorable canvases.  They were the perfect color and went right along with my cutesy woodland theme:
But.  BUT.  (And that's one big but.  From a girl who knows about big butts.) Check out the price tag.
$25 a piece????  Okay, in the scheme of things that is not a lot of money, but for one canvas... there was no way I was blowing chunks (ha ha) of my budget on a little wall canvas.  And then the little bell in my head went DING!

I remembered this post about wall art using scrapbook paper on one of my favorite blogs, Thrifty Decor Chick.  Now, if there's one thing I have hoarded enjoyed over the years, it is PAPER!  I love paper.  I was a Stampin' Up! demonstrator for eight years and I have quite the scary craft cave of doom collection.  Between my paper "collection" and my friend Cricut, I knew I could come up with something similar for much, much less.

Note:  One of my favorite tricks for coming up with a theme/mood/color scheme for a room is to find a paper collection that I love and use it for inspiration.  It helps me focus my efforts.  Some folks use fabric, but what can I say- this girl has a serious thing for paper!

I was right on board with using squares of MDF instead of canvas.  I bought a big sheet of 3/4" MDF and had the guy at Home Depot cut it for me.  It took about 5 minute to have the whole board cut into 12x12 squares and they didn't charge me anything for the cutting.  Husband acted a little miffed that I didn't bring it home for him to cut (something about manly pride) but I think he was secretly glad.  And that board would have ended up in our "Projects" pile for our kids to toss out after we die.  Because it would have sat there for 80 years.  At least.

First I lightly sanded the edges of the squares, but I didn't worry too much about perfection.  Then I painted all the edges white with plain old acrylic craft paint.  I made sure to paint about an inch around on the face of the board in case the wood and the paper weren't exactly the same size.
You can see in this picture how I've raised up the squares.  I just put scrap pieces of 2x4 under the boards.  This is so the paint doesn't stick to the newspaper covering my craft table.  Nothing ruins a great paint job like a bunch of lousy newspaper that just can't let it go!
I have made MDF squares for some of my other room, but I've always just used solid sheets of paper.  I wanted something a little more graphic for Girl's room, like the images on the Target canvases.  I turned to a Cricut cartridge that I'd always wanted to buy, but couldn't justify until I found out we had a girl coming to our family.
This is my Cricut station.  I clip little notes on the clothesline (from Ikea) to remind me of my settings for different projects.  That way I know how to set the speed, pressure, and blade for the Cricut, and the size I chose for each image.  
 Next I went through my hoard collection and chose all the paper I thought might work for this project.  I am a total craft snob, and I think Stampin' Up! paper and cardstock is absolutely the best quality.  I may not be a demonstrator anymore, but I have enough paper to last me through the 100-year zombie apocalypse.  For those who are fellow Stampin' Up! snobs, I used Certainly Celery, Soft Sky, Mambo Melon, Pink Pirouette, and Chocolate Chip.  I started by ModPodging an entire sheet of paper on each board.  My main colors for the room are aqua, light green, and pink, so I went with pinks and greens to contrast with the aqua wall color.
Next I started cutting out the image layers for each square.  I chose an owl, a mushroom, and a ladybug.  I cut the shapes as big as possible to still fit on a 12x12 background.
The hardest part of this project was waiting for the ModPodge to dry between layers.  I distracted myself by working on other things upstairs.  I would ModPodge a layer and then just leave the craft room so I wasn't tempted to add the next layer too soon.

If you've not worked with ModPodge before, I have a couple of tips.
1.  Don't be scared.  MP is amazing stuff, and very forgiving.  It's really very easy so don't talk yourself out of trying it because you think you'll mess it up.  Also, paper is very cheap, so if you do mess it up, scrape it off and start over.  You're not out much, and if the craft stores are closed during the Zombie Apocalypse, you can always come raid my stash.
2.  Brush it on with a foam brush and remember your motto:  Thin, even layers.
3.  Smooth out all the bubbles.  Start from the center and rub outwards to push any extra out the edges.  
4.  Even the best MP job will have a few bubbles left.  It always looks better after it dries so don't freak out if things look a little lumpy at first.  I promise.  It always looks better after it dries.  I will repeat this mantra as often as needed to help you keep from hyperventilating.

Once I had all my layers in place, Husband helped me hang the boards on the wall.  We did it exactly the same way as Thrifty Decor Chick- nails right through the corners.  I think he pre-drilled the holes, but I had pregnancy brain and that detail has gone bye-bye.  Sorry.

And here is the grand reveal:


LOVE THEM!  SO MUCH!  The vinyl above the boards is also from Stampin' Up! (now retired).  It is one of my favorite quotes and I earned the vinyl for free, but I'd been waiting for the perfect place to hang it.  I want my baby Girl to have confidence in herself and to follow her dreams, so this was the perfect place.

We hung the boards right above the changing table.  Every time I changed a diaper, Girl points at them and we talk about the pictures and the colors.  I always tell her, "Mama made these for you, because she loves you."  It still makes her smile.  And they make me smile too.

All things considered, these wall squares cost me about $3 for the wood, since I used things I already had on hand.  (Husband the accountant would point out that the supplies I had on hand still cost money, but who wants to listen to him, anyway?)  That's much better than $75 if I had bought three canvases at $25 each.

Thanks for sticking around through this very long post.  Next time I'll show you my lamp makeover.  I bet you just can't wait.

Friday, July 26, 2013

Baby Girl's Nursery, Part 1

"It's not who we are that holds us back; it's who we think we're not."
-Michael Nolan

What I'm reading:  It Starts with Food
What I'm writing:  Not much right now.  At least I'm honest!

Most of you know that I have three boys (10, 7, and 6) and one little girl (2).  When we found out we were expecting a girl, I was a little... excited.  Just a little.

Now don't get me wrong.  I love being a Boy Mom!  When we started having kids, I wanted boys and I was blessed with three in a row.  They are best friends and they are fun and rowdy and dirty and sweet and I adore them.  But after all that boyish fun, I hoped for a little girl to help even out the estrogen-testosterone balance (or lack thereof).  And I really, really wanted to craft and decorate for a girl.

I may have gone just a wee bit overboard with the nursery.  But Husband just smiled and got out of my way, and boy did I have a great time!  The only thing that slowed me down was Girl's decision to show up 3+ weeks early, which put a serious cramp in my crafting.  This is the first of a series of posts showing projects from Girl's room.

My inspiration for Girl's room came from Chris at Just a Girl Blog.  Her daughter's room is adorable.

I love the robin's egg blue walls, the pink, blue, and green color scheme, and the tree.  This picture is actually a little different than the one I looked at, since her daughter is getting older and they are updating the room.  As you will see in later posts, I shamelessly ripped off some of these ideas.  But when something is as perfect as Chris's room, it's hard to resist.

This is what we had to work with: our room in its original state.  The wall color isn't bad, but it's just kind of a bland beige and every room on the first floor was the same when we moved in.  Neutral paint colors are great when trying to sell a house, but now that it was ours, I was ready for some color.
The room had become a repository for all the unused/unwanted furniture and other items that we didn't know where else to put.  Note the beautiful rose-colored cabinet.  You'll see that again later.
Other challenges include large windows on two of the walls (great for light, not so great for furniture placement) and a closet on the third.
We were also cursed blessed with mismatched curtains on ceiling tracks.  Oh, the design potential.
 And finally, we had this treasure of a ceiling fixture.
The very first thing I did was rip down those, ahem, special curtains.  I truly loved them and shed great tears of agony as we gently deposited them in our large black trash receptacle.  Any neighbors who heard someone yelling "Woo hoo!  Die, evil curtains of Mordor!".... well, clearly that was someone else.

Next we patched the holes left in the ceiling from the curtain tracks, and painted the walls (you guessed it) robin's egg blue.  As we were painting away, Husband gave me a weird look and said "You know, now that we're finally getting a girl, I find it ironic we are painting her bedroom blue."  But I had a plan, you see.  I knew I would want to use a lot of pink and I wanted a different color on the walls to give the room some contrast.  No little girl needs to live in Pepto Land.  I also wanted to go with kind of a cutesy, outdoors, woodland feel.  The soft aqua was a nice "sky" without being too literal.
The little owl was handmade by me using this pattern from Little Hibou shop on Etsy.  Which, by the way, when I looked up the link I realized the shop has added a bunch more patterns and I am going to have to put those on my Christmas list!  I have just the set of five.  I was going to make all of them but again, little Girl arrived early.  The owl was not difficult at all and I would describe my embroidery skills as "extreme novice."  I would really recommend this pattern if you're looking for cute stuffed animals.

Ahem.  Sorry for the detour.  Back to our regularly scheduled nursery make-over.

One wonderful thing about our 1970s house is the big windows.  One complicated thing about big windows is finding affordable window coverings.  In the end we decided on white vinyl blinds for the nursery, but we had to put two blinds in each window because they are so large.  We found these great curtain rods at Ross Dress for Less.  I have had great success finding extra-long curtain rods for a reasonable price at Ross.  I think these were less than $10 each.  I especially like the glass balls on the ends.
I also stressed way more than necessary about the curtain panels.  I wanted something thick enough to potentially block light and drafts from the old windows, but all the lined thermal curtains were less-than-cute.  I found lots of fun sheer ones but they wouldn't block the light.  Finally, after much indecision and endlessly texting my sister pictures from every store in town, I settled on these tab-top striped cotton twill panels from WalMart.  I debated because of the yellow and orange- I was afraid it would bring in too many colors.  But in the end, I decided I love them in this room.  They bring a lot of bright fun and energy.
Maybe someday she'll outgrow the stripes, but for now they are perfect for my spunky, silly, sassy little girl.  P.S.  I know these pictures are kind of dark.  I am not a professional photographer, but I'm working on my skills.  Thanks for being patient with my learning curve!

The paint and windows were the first step.  In the next few posts I'll share some of my fun decor items.  Our budget for this room was extremely tight, so I'm pretty excited about the cute things I was able to make for very little money.  Stay tuned!

(Apparently my learning curve is steep and includes the post scheduling feature.  This post was supposed to go up on Friday, July 26.  It did not post on its own so I manually posted it on Tuesday, July 30... but it is still dated Friday, July 26.  Why must you mess with my mind, Blogger-demons?)

Wednesday, July 24, 2013

My milk glass cupboard and my friend Goober

"Progress, not perfection!"
-Fly Lady

What I'm reading:  It Starts with Food (Husband is also reading!)
What I'm writing:  Still working on that first romance

One of the great things about our house is all the built-in storage.  Our kitchen is humongous and we have tons of cabinets!  (Which is great for stashing stuff, but kind of overwhelming when considering a cabinet-painting project.  That's a subject for a different post...)  We have a display hutch in the kitchen with glass doors.  I've started collecting milk glass over the last few years and put it in this cupboard.  But it was just so BLAH.  No color, nothing to draw your attention.  The brown wood back of the cupboard blended in with the brown wood of the other cabinets.  Yawn.

I am not always good at taking a picture before I start projects (I'm working on it!), but here is one with a bit of the cupboard in the background so you can get an idea.  In the foreground is Boy 2 enjoying his PlayDoh.  He is much cuter than the cabinets.
I've been looking for something perfect to go in the back of this cabinet.  I considered wallpaper.  Textured, paintable wallpaper.  Contact paper.  Paint and stenciling.  Burlap.  Fabric.  Wrapping paper (one of my favorite items, which you'll see more of on this blog).  But I'm a perfectionist and I stared at that cupboard and just couldn't quite figure it out.  And I couldn't find quite what I was looking for.  I love all things old and antique and vintage, but I also love color.  I'm kind of going for a mid-century funky vintage sort of vibe.  I stocked up on all kinds of wrapping paper but it all seemed too formal (brocade, damask, etc).  I spent way too much time on the Interwebs looking at expensive Contact paper.  And then around Christmas I was in Hobby Lobby and I found it.  The perfect wrapping paper.

So I bought a roll, brought it home, and put it in my storage room where it collected dust for a while.  I just kept obsessing over how, exactly, I was going to put it up and make it straight and make it stick...  Until one day I was staring at that cabinet AGAIN and I said to myself, "Fly Lady says Progress, not Perfection!"  I found Fly Lady in January and she's changing my life, but I'm still a perfectionist in recovery.  So I marched downstairs, got the wrapping paper, and got to work.

I started by pulling out all the milk glass and washing it.  Then I took down the sliding glass doors (they're just on a little track so it wasn't hard) and pulled out the shelves.  Here's what I had:
You get a sneak peek of the roll of wrapping paper in the photo below, next to the very dusty shelves.  Just keepin' it real, folks.  
I took regular ol' Scotch Double-Sided Tape and started applying it around the edges of the cupboard back.  Then I put strips of it across the center, just every so often.  No measuring or being all perfectionisty- I just stuck up a bunch of tape until I thought I probably had enough.  If you look closely, you can see it along the edge in the photo below.
Now a part of me wanted to measure the cabinet, measure the wrapping paper, and cut out a pre-measured, perfectly fitting piece to go in the back.  I actually tried measuring the inside of the cabinet.  But it was hard to get a good measurement and I was frustrated.  So instead I cut a piece that I knew was just a little bit too long.  I matched up the corner and started pressing it to the tape.
I worked my way across the top first.  And it wasn't perfect.  By the end I was about 1/8" off.  But when I tried to pull the wrapping paper off, it really didn't want to come.  I didn't want to start over.  So I repeated to myself, "Progress, not perfection!"  And I started working down the side.  As I reached the bottom, I pressed the paper into the bottom corner of the cabinet with a Pampered Chef scraper.  You know, those brown plastic square thingys that come with P.C. stoneware?  They are good for all kinds of things!
 Once I had the paper taped down good and flat and had made a nice sharp crease with the P.C. scraper, I sliced off the excess paper with a craft knife.  In a few spots the cut was a little jagged, but it was so small and near the bottom that I knew it would be just fine.
I was almost done and feeling pretty dang awesome about myself when....
ARGH!  Egads!  Drat!  This spot did NOT want to behave and it had a good tantrum when the knife came along!  I was so frustrated.  So close to finished and this happened!  You'd think I was just using cheap wrapping paper or something.  Oh, wait...

I sat back and looked at this spot for a while.  Then I looked at the massive pile of milk glass air-drying on the counter.  And I decided to leave it like it was.  I KNOW.  Obviously I'm some kind of defective crafter, right?  What kind of wanna-be DIY blogger leaves a goober like that in the middle of their project?  A goober so nasty it deserves to be formally named Goober?

This one.

Yep, I'm okay with it.  I'll show you why.  Here's the cupboard with the shelves back in:
If you look closely you can see my friend Goober in the bottom center.  I mean, the polka dots are so amazingly adorable that they distract the eye, but still.  But be patient, my friends, because here is the finished cupboard with my milk glass.
Yup.  I put a plate right. In. Front. Of. Goober.  Mua ha ha!  No one will ever know Goober is there!  Wait, except for all the tens of people who may look at this post. Shoot.  I've gone and blown my dirty little secret.

Seriously, though.  I love it.  Just the right color and retro-styled fun to add a little pop to my kitchen of brown.  I love how the milk glass stands out against the red.  This cupboard makes me smile every time I walk by, and I think part of that is because I let myself be less than perfect and everything turned out fine and not one person died because the wrapping paper was not quite straight.

Tuesday, July 23, 2013

Doors and Date-Night Jeans

"Hope is wishing something would happen.  Faith is believing something will happen.  Courage is making something happen."
-Unknown

What I'm reading:  "It Starts with Food"
What I'm writing:  Not much right now.  Focusing (occasionally...) on my first romance novel

A few days ago I was pulling weeds and thinking about what to post.  I'd already come up with my first post, kind of an introduction and mission statement, but it was a little serious and heavy.  Where is the fun, lady?  It occurred to me:  I am about the same age as my house!  It was built in 1977 and I was born in 1979.  Maybe I should stop referring to my house as "older!"  Sometimes I still feel like I'm in high school, although a few quick bounces on the trampoline with my kids quickly remind me that it's been a while.  Honestly, I have no issues with getting older, per se- I was thrilled to turn thirty.  I had a great time in my twenties and accomplished many things.  I looked at my thirtieth birthday as a milestone and a gateway to an awesome new decade.  And it has been.  I feel like I've finally started to figure out who I really am and who I really want to be.  And that all of those things are within my grasp.

I've felt a new attachment to my house since I put its age and need for improvement into perspective.  There's not a thing wrong with this place just as it is, but like all of us, I'm sure it's itching for something a little new, and a little fresh! Girlfriend needs a pair of date-night jeans.  And we started with the front doors.

This is our front entryway from the outside.  Most of the time we only use one door, but the other door does unlatch.  My husband digs the double doors.  He's Mr. Practicality, and when we were moving in, this wide entryway made moving a breeze.  Well, I should never refer to moving a piano as a "breeze," but it was much easier than trying to squeeze the thing through a standard 36" door!  If he was the kind of guy who kissed inanimate objects, these doors would have got the love.

But... they're old.  Kind of outdated.  The storm doors had those funky decorative grids and the inside wood doors...
Really kind of cool, with the decorative carving and the metal scrolly-thing around the doorknob.  The varnish was cracked and peeling and the wood was faded.  I'm pretty sure this was the original finish.  Replacing these doors is not a top priority right now, and they are still very solid and in good shape.  But they are the first thing you see when you visit the house and it says OUTDATED.  As in, that haircut your aunt has had for thirty-five years that was super trendy back when she was seventeen.  Kind of like this:
So we decided to work with what we had.  Yeah, baby, saving money and making the retro fresh!
Here is one of the doors laid out in our garage, in the middle of a good sanding.  You can see the carving better here, as well as the bad finish.  One thing I learned from this project:  Your cute little Black & Decker Mouse Sander has a little attachment perfect for sanding all the nooks and crannies of the carving, but it does NOT need your help and you do NOT need to push it down onto the door for more sanding pleasure.  Use your fancy new CrossFit muscles somewhere else, because putting that much pressure on your sander will cause it to have a nervous breakdown.  Okay, literal breakdown, and I had to replace the sander.  Anyhoo....  Next the doors got a lovely new coat of primer.

Husband even put on his happy face for this project!  We applied the primer with a paintbrush and it worked great.  Finally, the paint.  I am a believer that a new coat of paint can fix just about anything.  I was looking for a good, deep cherry red.  The red we got ended up a little brighter than I expected, but I love it.  I unfortunately did not take a picture of this step, but Steve used a little sprayer from Harbor Freight with his air compressor and sprayed the door.  We decided that was the best way to get an even coat in all of the fancy carving.

While Steve painted the door, I removed the extra grills from the storm doors.  It was easy- they were just attached with screws so they came right off.  (Sad note, and marital tip:  Make sure you stash things like extra grills from a storm door in a safe place if you are planning on using them for another crafty project, because they may become victims to Husband's periodic urges to clean the garage.  Le Sigh.)  Husband removed the doors, I took out the glass, and I used just regular black spray paint to give the frames a makeover.  We also spraypainted the same, original doorknobs.  We debated for a long time about that metal scrolly-thing and in the end, decided to spraypaint it too.

New, sleek storm doors back up, doors painted and re-installed...
 I love the sleek, simple look of the storm doors with no grills or decoration!  I can't tell you how many people have asked us if we bought new doors.
This gives you a better idea of how the hardware looks.  I was really torn about whether to keep the scrolly-thing (yes, that is its official term) but Husband (not his official name) really loved it and now I do too.  I think it looks cool and it keeps some of the original unique charm of the house.  The 70s were not really my favorite decor years but I think even in updating, you have to respect what a house is.  This will never be a Victorian-era cottage, no matter how much bead board I install.
Here's a view from inside:
The doors are great.  I still want to replace them at some point, but that's mostly because I want more interior light and these are solid wood.  But until that project moves up the list, I love my bright red doors.  They will be getting another makeover soon because we are painting the exterior of the house, but the hard work of sanding and priming is done.  A new coat of paint and we're in business!

I smile every time a friend stops by and says "I love what you've done to these doors!"  A lot of visitors don't even come inside, so it's important to me that the entryway is inviting and attractive.

And I like to think my house appreciates looking pretty.  If these doors are her date-night jeans, I guess she needs a statement necklace next, right?